The big UK freeze, lack of time & an unwelcome round-numbered birthday have all contributed to a complete lack of progress with the Fiftythree Flying Cloud but as the first signs of spring appear & thoughts turn to camping, I've finally got back into gear & started to tackle the badly bent door.

The old Door-in-a-door was hinged suicide style, so at some stage (probably on her journey to the port) had flung open, wacked into the side of the trailer & done its best to reverse its curved shape.

Doors of this age have all the internal sections made of bent aluminium, not cast as in later models. So with a bit of deconstruction and gentle persuasion it should be possible to reverse the damage. The trick is to gently anneal the aluminium frames. Use a soapy liquid (washing-up liquid is ideal) and smear it all over the area you want to heat. Keep the heat moving over the area and the liquid will boil, bubble & evaporate away, keep heating and when the residue turns black, STOP. If you don't you run the risk of the aluminium evaporating in front of your eyes.

Let it cool for a few moments & then start bending & shaping it.

Once you're happy with the shape the black residue will easily clean off with some wire wool

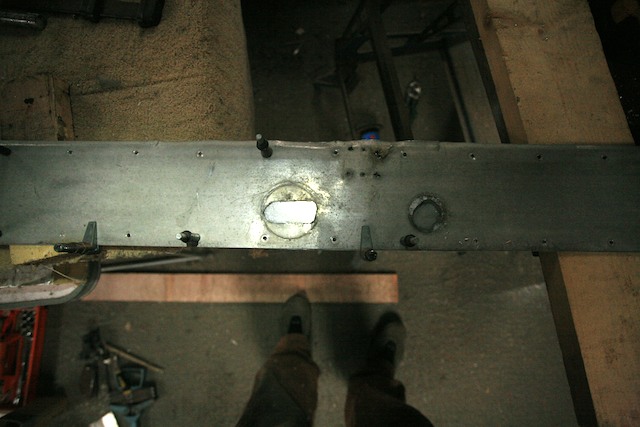
I'd removed the inner section to make it easier to work on but the outer one runs round both sides of the door, so rather than disassemble the entire door, I decided to rig up some support over the vice...

... a bit Heath Robinson but it did the job fine.

More heating

STOP
Into the vice for some squeezing, bending, hammering & cajoling

The trick is knowing when to stop. If parts have been stretched you'll never get them to unstretch & hammering will only stretch it more. Luckily my frames were bent but not too badly stretched.

Cleaned-up and ready to reassemble


The crucial thing is the curve of the door and most of the frame is hidden by the door skin, so don't worry too much about the odd ding & ripple.


I think I've said before that I see restoration as a balance between repair & replace. I don't want a trailer that has every panel replaced and every blemish removed - I'd have bought new if I did. The odd bump & bruise are the marks of her history, she wouldn't be the same without some of them. I draw the line at some things though, and this door skin where someone had added a lock hasp has to go.

A new flat panel needs a slight bevel on the edges - I used my C channel bender.

And once cut & bevelled, the old skin is used as a template for the original rivet holes
The door fittings & deadlock were beyond repair, so I marked their places but left them uncut for now.

Beginning to look the part

Armed with a battery of Clecos and Cleco clamps its a pleasing jigsaw to reassemble


Its worth checking the curve of the door, and err on the side of too much rather than too little.


Its one of those nice riveting jobs where you can sit down & get to both sides - comfy bucking !

I have to admit that since you need two hands to buck rivet it makes it pretty well impossible to do it and photograph yourself - I admit defeat.

Though if you end up with any smiley faces on your rivet heads, you've only got yourself to blame !


Next - the Deadlock. A modern RV one but looks part on a 50s trailer.
Use the template...

...measure twice

...and drill once !


Although most of the insulation wasn't filled with mouse runs, I stripped-out the old Rockwool

and replaced it with the same modern aluminium bubble-wrap that I used on the inside of the trailer.


The inside of the door was all pop-riveted.

Now the hinges.

My old set were bent & buckled, so I bought a new set from Vintage Trailer Supply .
They're not cheap but they are well made. But they do need drilling.

I pretty much copied the pattern of holes on the old ones as I'd added heavier duty plate behind the sieve-like skins & the new hinge would hide the old holes.

I initially drilled them @ 4mm, so I could fit the door but leave some room for adjustment before re-drilling the holes to take heavier-duty long-shank 4.8mm rivets.


The hinges are clearly bent differently, so it shouldn't be difficult to tell the top from the bottom - but I still mark them to make sure !

Popped into place


And ready to hang...

Here's where you need a spare pair of hands.

But once you have a hole drilled and clecoed top & bottom she'll hold nicely

From above you can see the need for the complicated bends & overlaps on the hinges.


Voila !

Remember, behind the outer skin is my heavier plate to take the weight (which isn't much) of the door.

A few more pops & she swings nicely.


The original hinges went under the door skin but the area was so pitted with holes I either needed to replace the whole skin panel or mount the hinges on the surface.

I went for the latter as they'll be covered by the outer hinge when the inner door is closed & since it too has them mounted on the outside, I didn't think it looked out of place.

Still need to fit the rubber seals but she's a good fit.

Done !


A little jiggling & the all-important (for suicide doors particularly) deadlock fits into the old mortice.
Yes you'll probably spot the three holes from the old hasp that would have lined up with those (now vanished) on the replaced section of door skin. Three Olympics should sort them out.


Door-in-a-door... Beautiful, and is there anything that says Airstream more than this ?

Starting to look her old self again.

Windows & wheels & we'll be rolling down the road... soon.


.jpg)


Simply outstanding. Now the Internet has the first good resource, in my opinion, for dealing with sprung doors.
ReplyDeleteNot that it matters, but were you referring to the Heath Robinson machine used by British codebreakers World War II to decrypt German messages?
Excellent work - thanks for posting it.
Tom
Thanks Tom. I have to admit it was one of those jobs that I was convinced would end in a quagmire of problems but for once, it didn't.
ReplyDeleteThe Heath Robinson was William Heath Robinson - artist and creator of fantastical machines - Google his images:
http://www.google.co.uk/images?client=safari&rls=en&q=heath+robinson&oe=UTF-8&redir_esc=&um=1&ie=UTF-8&source=og&sa=N&hl=en&tab=wi&biw=1011&bih=627
The codebreakers used the Enigma machine. Wonderful though he is, I feel if we'd used his machines rather than the Enigma, the war might have ended differently. Though possibly it might have been more fun!
Chris
Thanks, Chris! Great post.
ReplyDeleteI've been trying to come up with proper trim for my curved and laminated sill at the bathroom doorway for weeks. Finally decided to use aluminum trim, but it would have to seriously bend in two directions.
No courage until your post made me get out the torch and gloves and now the first piece is in.
cheers,
steve