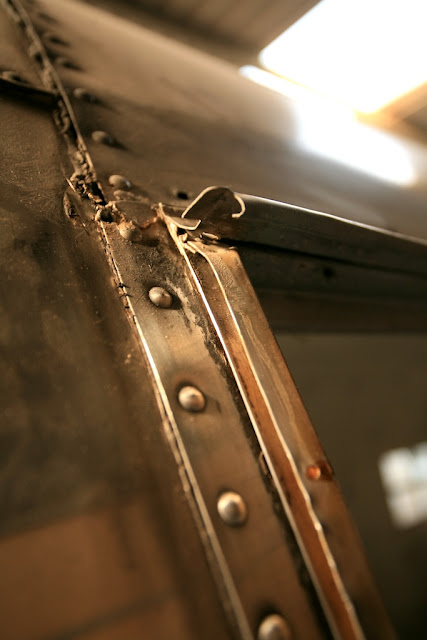
Now you probably thought the Door in a Door is one of Airstreams coolest features but is this a first ?
A WINDOW IN A WINDOW !!!
Yes I'd stripped off the old backframe gasket and got rid of most of the glue & always had a sneaky feeling there was something odd about window No 3 (I'm counting anti-clockwise round from the door)
But I still hadn't clicked what exactly was odd about this frame
until I looked up to the top of the frame... its obvious there are two backframes
Once I'd realised, it was obvious. They'd just jammed an identical backframe into the original !
In places a clear mess...
... but in others a little more subtle
The curled window hinge at the top had been drilled off & re-mounted on top of the second backframe.
Quite when it was done, who knows
But unlike the Door in a Door, this one has to go !
Luckily the original backframe, apart from a few extra rivet holes, was in fairly good shape
Out she came...
Window in a Window no more !
Refit the window hinge (after a bit of gentle straightening)
Clecos hold it until its bucked in
Not the neatest rivet line but it seems pointless to drill even more holes
and all of these will be hidden by the drip cap when its refitted
And since these are just above an interior sheet line they're easy to buck single-handed
Now to polish the roof...
I'd already refurb'd the awning rail - unbelievably they'd fitted another more modern awning rail on top of the original (I think there's a theme developing here !). Luckily, like the window, the only damage to the original was a few extra holes
Unlike the vertical sides of the trailer the roof is rather more tricky
Slow & steady, gradually the shine appears
A variable speed Makita polisher & Nuvite F9
A second pass of F7...
... and we're beginning to get there
The central panels are a bit trickier to reach especially as the vents are too small to get through
But a rigid crawling board resting on the vents worked well as a solid platform, from which I could...
... lower my legs (just) through the vents and balance on some steps inside - sorry you'll have to imaging that one as even my photo skills couldn't manage to snap that one !
Its grubby work and there's no short cut... but you get there gradually, and the first F9 cut is by far the hardest to do.
Done - F9 & F7
Now just the endcaps with their original patina...


.jpeg)


