Sunday 14 June 2009

Measure twice... cut once !


Sorry for the lack of posting. This work was done a month ago but other work has taken me off to Borneo to shoot a interesting documentary about the US crew of a 'Liberator' bomber, shot down towards the end of WW2, over central Borneo and captured by the Dayak headhunters. The Dayaks sided with the airmen and over the next 7 months looked after them and ran a successful guerilla campaign against the occupying Japanese army.  The only survivor now lives in Houston, Texas. It should air both in the UK on Ch 4 & US on PBS.  

But now back to more important work...

With £800 of Marine Ply secured to the chassis I rather nervously got out the jigsaw...


I started with the step. The old maxim; measure twice, cut once, was ringing in my head. At this stage a cock-up would be costly.


A good steel edge & a heavily scored line to cut up against is the best way to get a nice clean edge in plywood.


The chassis was pretty true but it made good sense to always work off and check measurements back to the centre-line.


I first cut a generous inch wider than the template. 


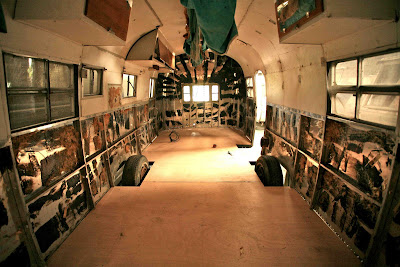
And the beauty of having the body-shell balanced on a chain-hoist meant it was easy to wheel the floor in and out. Checking, measuring and trimming. Little by little.


I used the off-cuts from the best preserved curve to shape the exact same shape for the others.


Until finally the body dropped snugly onto the new floor.


The outer sheets overlapping the plywood and the rivet holes lining up ready to be re-rivetted to the C-channel which will be the next thing to fit.


Time for a new floor...


Pete Ritchie (of Vintage American Trailer Co) had been busy prepping the chassis for the new EU tow-hitch. We'd decided to add a square-section steel running up the centre-line from the axle which will take the new hitch and add a little stiffness to the chassis.


5 Sheets of 3/4", 8 x 4ft Marine Grade Ply - pretty pricey at £130 per sheet - should last another 50yrs. 


Using the hardboard templates taken off the old floor as a guide to the corner curves, laying the new sheets was pretty straightforward.


The chassis had been painted with rust-inhibiting paint & rather than use rubber strips we used a generous bead of silicone to provide a barrier between the wood & the steel. I know that just about anywhere else using silicone is seen as the devil incarnate but here its perfect.


The 8 x 4 sheets butted-up perfectly on each 4ft chassis cross-member. Sikaflex was used to bond the sheets together. The beauty of Sikaflex is that its a powerful bond that always remains flexible but once cured is sandable.


Sheets were fixed at regular intervals to the chassis cross-members.


We used large countersunk, stainless-steel bolts. Their heads have a hex key fitting and they pull in flush with the floor surface as they're tightened.


Now to begin the trimming off the excess for a perfect fit...