But now back to more important work...

With £800 of Marine Ply secured to the chassis I rather nervously got out the jigsaw...
I started with the step. The old maxim; measure twice, cut once, was ringing in my head. At this stage a cock-up would be costly.
A good steel edge & a heavily scored line to cut up against is the best way to get a nice clean edge in plywood.
The chassis was pretty true but it made good sense to always work off and check measurements back to the centre-line.
I first cut a generous inch wider than the template.
And the beauty of having the body-shell balanced on a chain-hoist meant it was easy to wheel the floor in and out. Checking, measuring and trimming. Little by little.
I used the off-cuts from the best preserved curve to shape the exact same shape for the others.
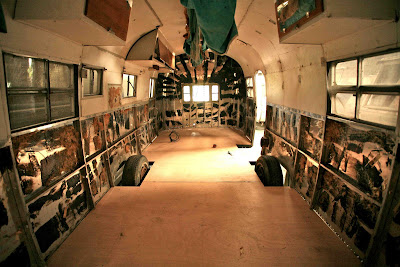
Until finally the body dropped snugly onto the new floor.
The outer sheets overlapping the plywood and the rivet holes lining up ready to be re-rivetted to the C-channel which will be the next thing to fit.


.jpg)


I hope you know how excited I get reading your blog. Please stop the working and keep playing, my thirst is horrible.
ReplyDeleteToo kind Frank !
ReplyDeleteI'm just a keen beginner who takes quite good pictures. Its looking at your blog that gives me ideas and answers.
Sadly I have to take the work when it comes up as I need the dosh to keep playing with your heritage.
... and for that thirst I can highly recommend some English Bitter !
PLEASE recommend some good English Bitter!! :) We have the same jigsaw. I love that thing. Keep up the great work.
ReplyDeleteGood English Bitter - now you've opened up a whole other world ! Its a bit like the Irish saying that Guinness only really tastes as it should in Ireland (and they're right). To truly sample Bitter you need to have it in an old pub (our's even has the obligatory grumpy landlady) and it should come directly out of the barrel or on a syphon pump but no pressurised CO2. You then admire its rosy amber colour in the faint sunlight that finds its way through the drizzle of a true English summer and that taste of warm, nutty hoppiness transports you to a magical land of village greens, cricket and girls in thin, floral dresses. All this while you lean on the bar and talk complete rubbish to your fellow drinkers (some things are the same the world over !).
ReplyDeleteSo the only answer is to come on over Frank & Ryan - the first pint is on me.
Man I'm thirsty now. Love your blog. I've been following since Ryan told me about it when he first got started on his Flying Cloud. Can't wait to see how your shell to frame reunion goes. That part really frightens me.
ReplyDeleteNorm
I am in the process of redoing my floor. Of course...a lift and covered work area would make this MUCH easier. Getting the front and rear curved templates are causing the most issues.
ReplyDeleteAre you planning on installing the wheel wells with the flange between the floor and frame as it was originally, or are you mounting them on top of the floor?
Steve
Steve
ReplyDeleteWhen I took my wheel wells off the inner covers were screwed to the floor & the metal nearest the wheel (outer) seemed to run down and join with or near the belly wrap. But if there's something I've missed do let me know.
Yes the covered work area is great (but it does cost and is miles from my home - Vintage American Trailer Co - Pete Ritchie is a real expert in all things trailer-wise both sides of the Atlantic. But we're sharing the work to keep costs down.
The templates seem all important when you're lifting the body -shell and they're a useful guide but when you have the new floor laid and are cutting it you really need to gradually inch in until the shell fits really tight. As for the curve on the corners, I'm sure there is a correct radius but I just got the best curve I could from the best corner & repeated it for the others.
Good luck ... us 53s are the BEST
My wheel wells were also screwed into the floor from underneath, but the flange around the base did extend between frame and floor a little. Should not be an issue. The one issue I believe I will have is that I am using 3/4" flooring now istead of 5/8". The area on the body where the wheel well connected will be off slightly. I will work it when I get to it I suppose.
ReplyDeleteKeep up that great work.
Steve
I also used 3/4" marine ply but since the wheel wells were SO knackered I've decided to make new ones, so they'll definitely fit as they'll be custom tailored.
ReplyDeleteGood luck. Chris
Hey Chris,
ReplyDeleteCould you shoot an email me to at rvleaks@yahoo.com. I have something to discuss with you.
Steve