
Pete had fitted the last two bellywrap sheets and flipped the chassis right-side-up (cheers, Pete). Now it was time to drill out those temporary pop-rivets, fit the last few bolts holding the frame supports & buck the bellywrap ends to the C channel... before reuniting the shell & chassis.
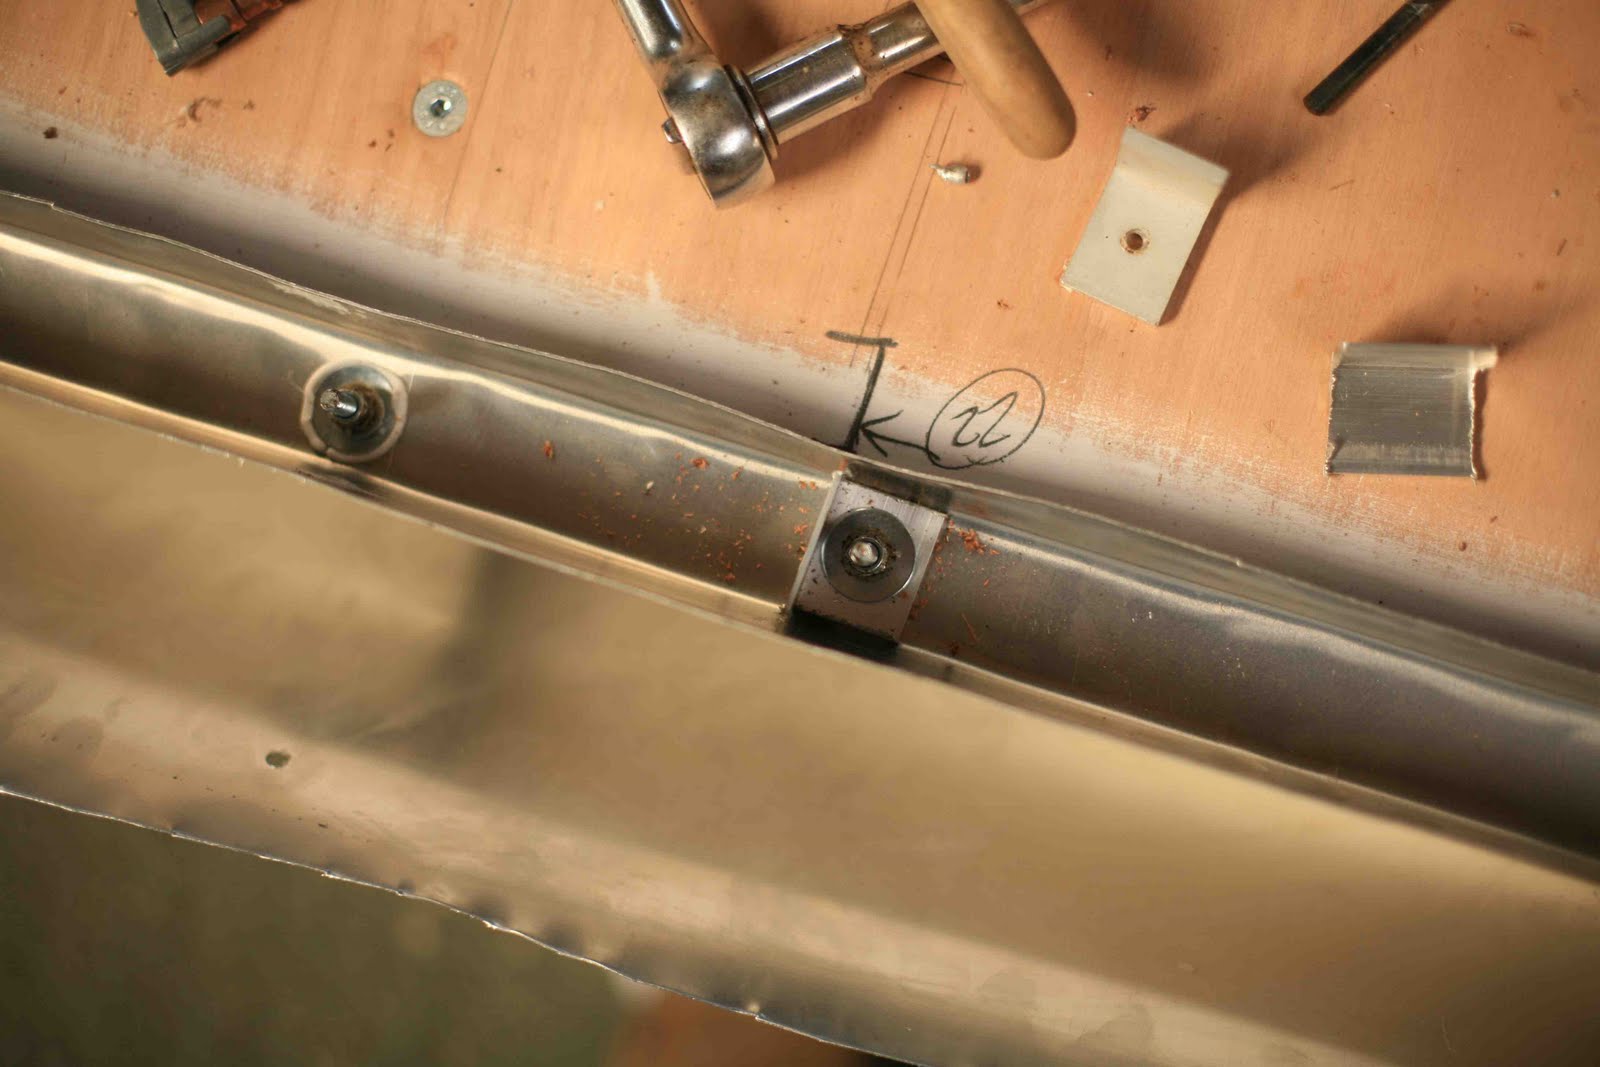
I'd marked the position of the frames supporting the body-shell and used a short section of right-angled aluminium which was bolted through the floor and outrigger, leaving an upright to rivet the frame end to.


I'd decided bolt up through the floor (rather than down) which made things a lot easier. Rather than bend the bolt ends to stop the nuts loosening I added a Nyloc locking nut on top of the normal nut.


Along with the Clecos, I found the Cleco spring clamps incredibly useful.
Surprisingly powerful for their size, they're perfect for clamping the wrap to the C channel before riveting.


The shortest was perfect for 2 sheets - wrap and C channel.


And as a novice 'bucker' it was a good way to learn as you can see both sides of the rivet, feather the trigger on the gun & watch the rivet end fatten, flatten & lock the sheets together.


Before we tried to reunite the two halves it there was a lot of dried Vulkem on the lower, inside edges of the skin. A scrape with a putty knife and a light sanding (one area we're not going to polish) gave us a clean and keyed alloy surface that should slip over the bellywrap and bond to a new bead of Vulkem.

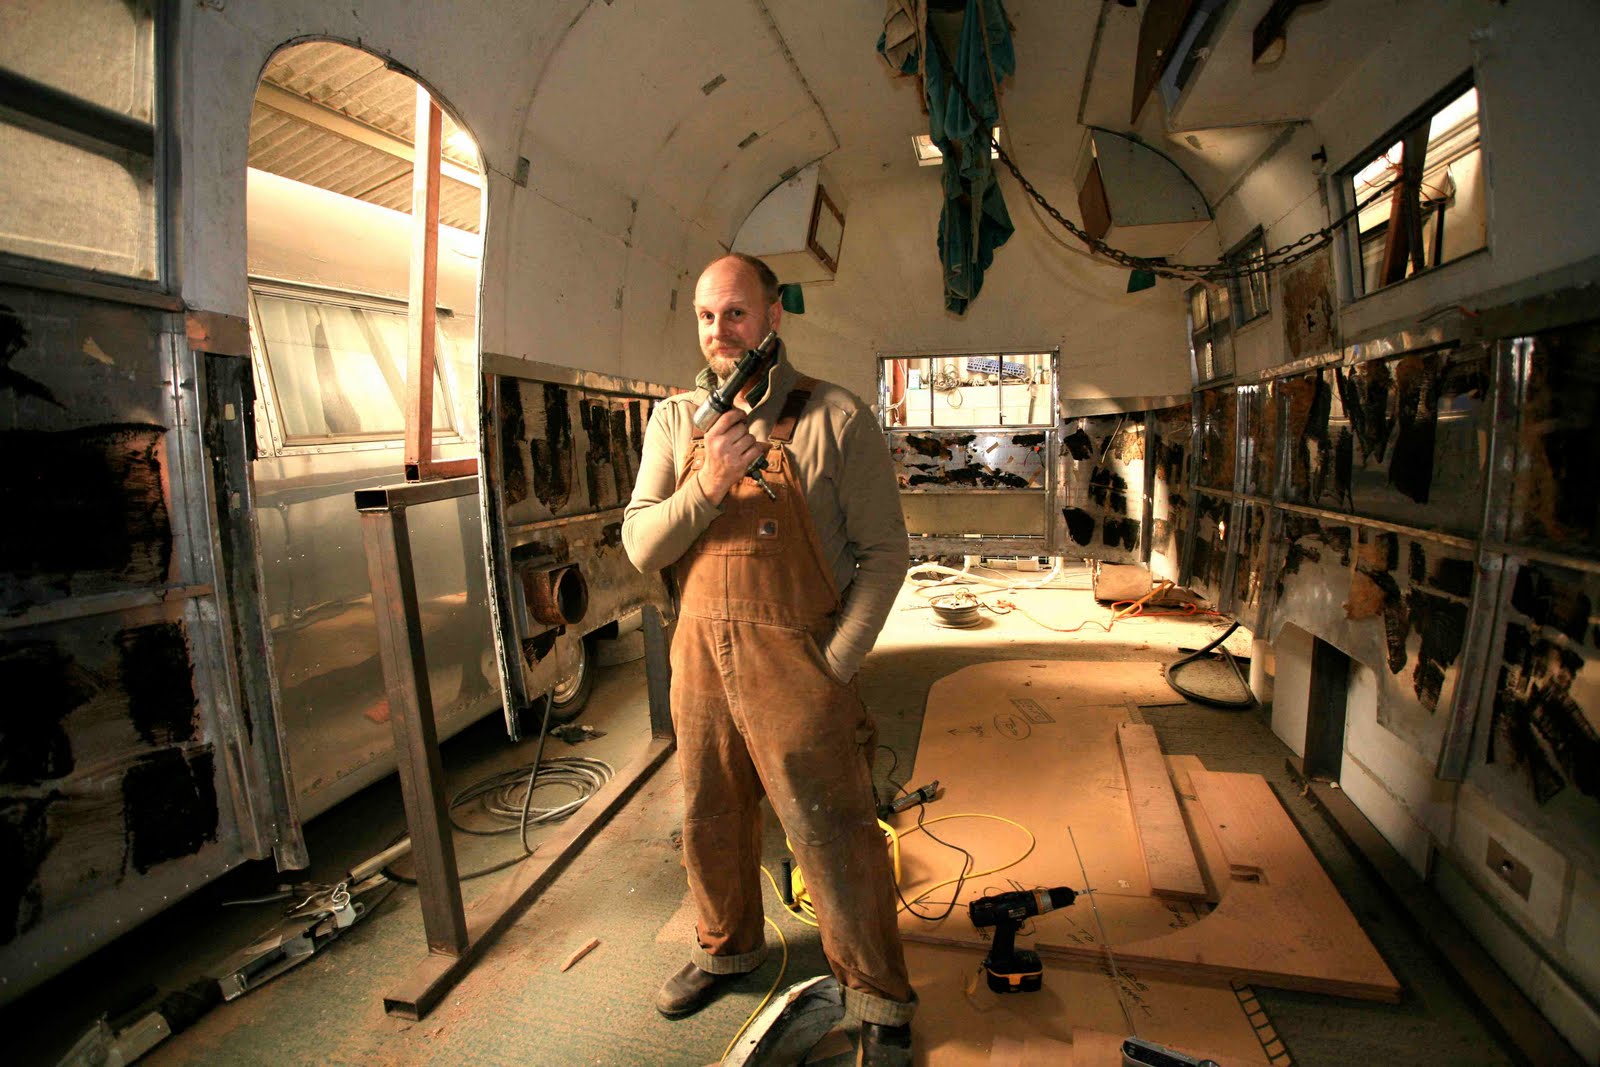
It dawned on me that I'd never taken the obligatory shot; standing on the ground inside the trailer clutching a optimistic bottle of beer - no beer to hand so my best James Bond 0.032, License to Buck !

One new toy - Einhell Air Shear.

Makes very light work of cutting shapes out of sheets.

The 1953 FC didn't have a steel plate at the front of the trailer, as later models do. Instead it had a larger aluminium sheet running up the inside of the skin.

I used it to cover the front frame & make a neat exit for the twin gas lines.


All ready to go...
Just a quick cup of tea (...its the law in Britain) before lining the two halves up.


I can't say the shell just slipped on like a knife though butter - it took a lot of 'up-a-bit, down-a-bit' and teasing the skin outside the wrap while keeping the frames inside. We got the rear on first and worked our way forward - thin putty knives are very useful to stop the sheets catching. But with a little gentle persuasion they eventually fitted perfectly - and tightly.

We decided to temporarily pop-rivet along the corners which was enough to hold everything in place.

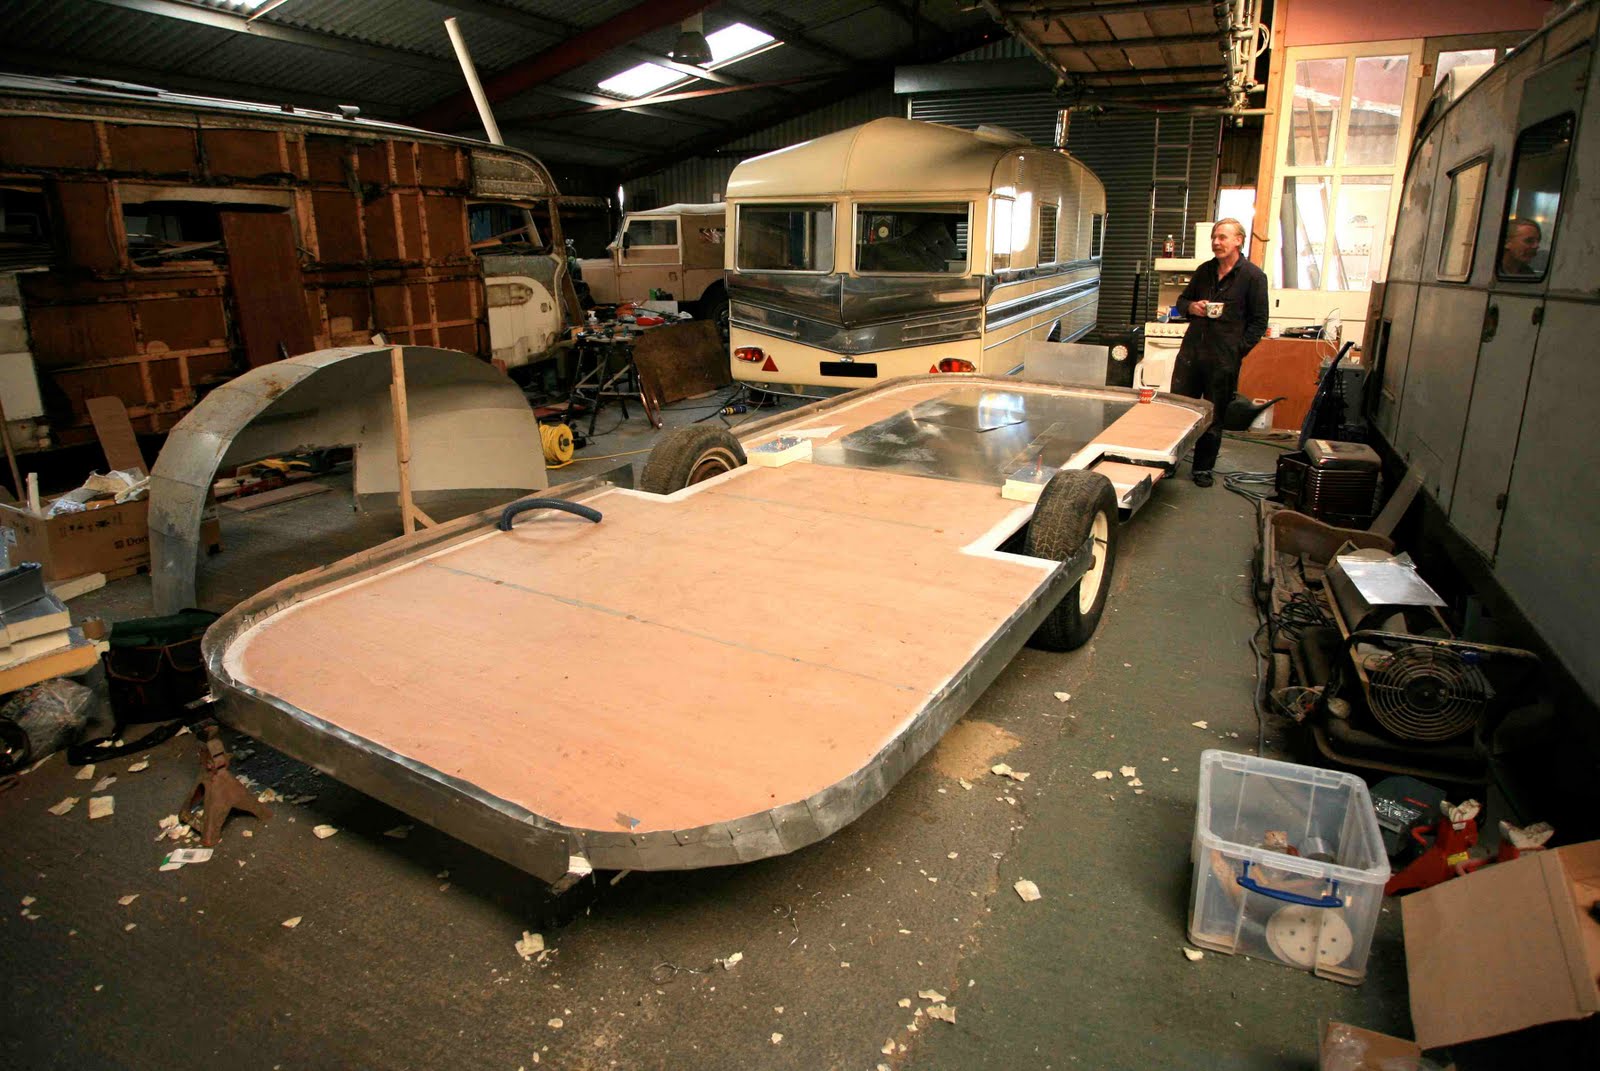
As you can see she's a little hemmed in by a Safari & a Vickers, but now she can stand on her own two feet, Pete will rearrange the shop so I can get round and buck that join line.

Inside the frames lined up perfectly with the angle-brackets.

The front end-cap had come out to repair the dent.

But I'm pretty sure I'll take out all the interior skin to renew the insulation.

The well-padded beam hadn't made any marks or dents & I'd really recommend this way of lifting the body-shell - a central chain hoist through the centre vent allowed the shell to balance perfectly, retain its shape without the need for any bracing and the chain hoist gave us precise control of lifting & lowering.

... O3069 rides again, soon !


.jpg)


