 Time to ignore the airborne distractions outside & deal with the unseen areas; the underfloor insulation & the bellywrap. Look at the photo on the right closely.... No, its not a new low-rider Flying Cloud
... the chassis really is upside-down.

Thanks to Pete and his forklift @ Vintage American Trailer Co I had the luxury of working on the underside of the chassis from the topside.

We'd decided to use rigid, foil-backed insulation board.

70mm sheets fill the gap between the floor and the bellywrap perfectly. It won't absorb or trap water, so hopefully the rust associated with the original rockwool insulation trapping moisture against the steel of the chassis won't be repeated. Edges are easily shaped to fit with the curve of the outriggers.

The sections were glued to the underside of the floor and the joins taped with trusty aluminium tape.

We also taped over the chassis steel too - it'll hopefully help, along with the paint, to cut down on the corrosion problems of aluminium meeting steel.
... the central box is for a flexible water tank. We'd decided where possible not to maintain her strength & not cut through the floor if there was another option; so the water tank will be slung under the main floor.

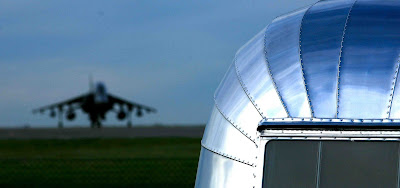
Outside Pete's workshop there's always the pleasant distraction of the Harrier pilots training...

... not a bad backdrop for the 54 FC.
Time to make a start on that bellywrap... We'd saved the corroded old sections to provide rough patterns.
Mark, cut, bend, clamp...

... and finally a pop-rivet. In true Airstream style, we weren't too worried about neatness; the main concern was to get a nice neat curve on the sides.
The plan is to fit the whole wrap and then spin the chassis back to allow us to trim the edges and buck rivet them to the C channel. All of which will be hidden once the body-shell is dropped back on.


We used 4mm pop-rivets with a wide flange.

... and pretty soon she was starting to look like a worm's eye view of an Airstream.
 At Pete's suggestion, I used some vintage car trim to protect the aluminium sheets from the abrasive edges of the outriggers. Our's came from Woolies in Market Deeping, Peterborough.

Its simple to cut, bend to shape and push on. It naturally grips and won't fall off, so should stop any chafing of steel against bellywrap.
To take the EU-legal tow hitch Pete has welded a sturdy box steel pole up the centre-line. We fitted right-angle aluminium to its sides to rivet the bellywrap to.


The bellywrap sheets fit up the sides of the water tank box, so should blend in nicely (if its noticeable at all).
A couple more days & she'll be ready to spin rightside-up again.


.jpg)


Nice work, Chris.
ReplyDeleteSure like that idea of using trim on the ends of the outriggers. Going to borrow that idea!
steve
Wow Chris,
ReplyDeleteJealousy here as we could not flip the chassis over for belly pan work. I am sure it would have been MUCH easier to do that way.
Steve
Beautiful pictures Chris, and very nice looking work also. When we get around to this part of the restoration I'll need to remember this post. I'm also impressed with the idea of the trim on the ends of the outriggers.
ReplyDeleteNorm
Just beautiful work! I sure wish I could have flipped the chassis over, it makes it so much easier to do a high-quality job.
ReplyDeleteAnd I love the names of places in the UK. "Market Deeping, Peterborough" sounds so much cooler than, "Jonestown, Travis County" !!! :)
-Marcus
Beautiful pictures & wonderful work! I can't wait to see the end results. Thanks for stopping by my blog.
ReplyDeleteGreat job Chris! I really like to idea of flipping the chassis over, just like the factory, and now with seeing you work I will plan to do the same. I also love your work space, right next to the airport sounds great to me! -Tim
ReplyDelete