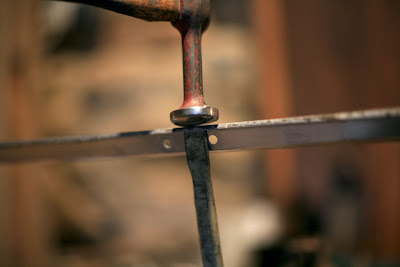
Time to start on the Hehr Standard Windows
Having taken out all the windows & brought them home to Devon
with a little help from Arthur (our 18mth old Lab)
it was time to make a start rejuvenating them
in my rather cluttered workshop
Luckily window restoration doesn't take up that much space
just a bench... and quite a bit of time !
Although they're broadly identical, I still tend to number every window as they come out (and have etched it onto the inside of the frame)
Dismantling isn't as easy
as it should be
The big problem is the steel screws & bolts which have accelerated corrosion having spent 55yrs touching the alloy of the windows.
Surprisingly with some WD40 and brute force, a few come free
... and there's only one option for those that don't ! Its a bit tricky but a wafer thin cutting disc & steady hands see them off
Once they're out the rust staining cleans off & the simple window construction is pretty clear
A few Airstream souvenirs I won't be keeping !
So the dismantled window is 7 pieces: The pressed & folded main frame, 4 x glass securing strips, a central strut and the Hehr catch.
I know we resist any sort of abrasive other than Nuvite on the trailer skin but the windows are a bit different (& I'm not even sure they are Alclad). I found the finest grade of Scotchbrite works really well for cleaning off the oxidation & the rust staining.
Voila - its more mirror sheen than mirror shine but I'm fine with that for the inside parts of the window
I tried some small felt heads for my drill
They worked pretty well but left quite a few swirls, so I went back to hand polishing the outside face
Ready to reassemble
First wash your hands - the new Hehr Glass Seal is very good at taking all that aluminium dust and grime off your hands !
It probably the easiest job - cut a square end and push it onto the edge all the way round.
I haven't glued it but could always run bead of glue in at a later date.
Another square cut...
... and the job's done.
I avoid silicone where possible
but here a small bead and dots in the corners helps hold the glass in firmly
Glass in - now to fix
4mm x 8mm pop rivets do the job nicely
and pull it all together tightly
Looks rather better ?!
In the corners I used small washers on the inside as the holes were rather larger than the 4mm rivets
Neater than the rusty bolts
Done
It took about an hour-and-a-half for each !
I found the Scotchbrite off eBay - 20 x 9inch pads for £11.
I found it easier to cut them into four smaller pads as its often that straight edge you need
You get through them pretty fast but it brings the aluminium up to a nice sheen
Knocking the dings & dents out of the sections takes a bit of time & need a bit of ingenuity for the slimmer sections
but its worth it when it all goes back together...
... and you'll never do it once the glass is back in.
A pleasing stack - ready to refit.
I used 4mm float glass - I looked into using a thin laminate but they all end up too heavy
The Bathroom window still had its original glass
... so I decided to keep it.
Cleaned up its like new
Vintage privacy !
The two vertically-hung front windows
One done
Clean & polish
Glass seal
Central strut
Done


.jpg)


That must be a great satisfaction to know you've done your windows. And I love that you got to keep that bit of vintage "privacy glass".
ReplyDeleteBTW, I believe cluttered shop to be a sign of creativity. Much more productive than an empty one. LOL!
Nice work, Chris! Brings back memories of doing mine.
ReplyDeleteI really appreciate the effort you put into photography. I know I just snap pics as an afterthought, but I see lots of planning and setup time in yours.
cheers,
steve
Once again, kudos for establishing an in-depth reference to follow. Future Hehr window restorers now have a cake walk.
ReplyDeleteSimply outstanding.
Tom
I have to second Steve's comment on the photography. Great photo journal. And very nice work on the windows too.
ReplyDeleteNorm
Thanks Dacia, Steve, Tom & Norm, for all your kind words on the old photography. Its sort of my day job (well, moving pictures), so they ought to be good but I do enjoy taking them and poking a lens into those awkward corners - you can explain things ten times over but I find a picture helps make it crystal-clear.
ReplyDeleteBeautiful weather in the UK, so thoughts are turning to that first camping trip - just the minor job of re-fitting the interior.
Chris
Outstanding work! A superb photographic reference.
ReplyDeleteAwesome job! I like doing the Standards rather than Jalouise but that is a boat load of Standards.
ReplyDeleteThis is the kind of blog posts I like reading.
-Brian
1964 Shasta Louise Blog